
Imagine having a space in your home where you can turn up the music, let loose, and get spinning or tricks on the dance pole – all at the same time. Unleashing your inner dancer just got a whole lot easier. Now, thanks to portable dance poles or even permanent stripper poles, you can express your rhythm and creativity in the privacy of your own home. While the idea of installing a pole may seem daunting, it’s actually simpler than you might think, provided you follow the right steps. This guide will walk you through the process of installing both permanent and removable dance poles.
What You’ll Need
- Stripping Pole Kit (Permanent or Portable)
- Stud Finder
- Electric Drill
- Level
- Measuring Tape
- Ladder
Typical home pole set includes:
two parts of a new pole, extensions of different sizes, top adapter, x-joints of different sizes, base, upper dome, hex key, carry case, manual.
There are not only permanent poles but also portable and removable ones. Below are step-by-step installation instructions for setting up each type of pole.
Permanent Stripping Pole Installation
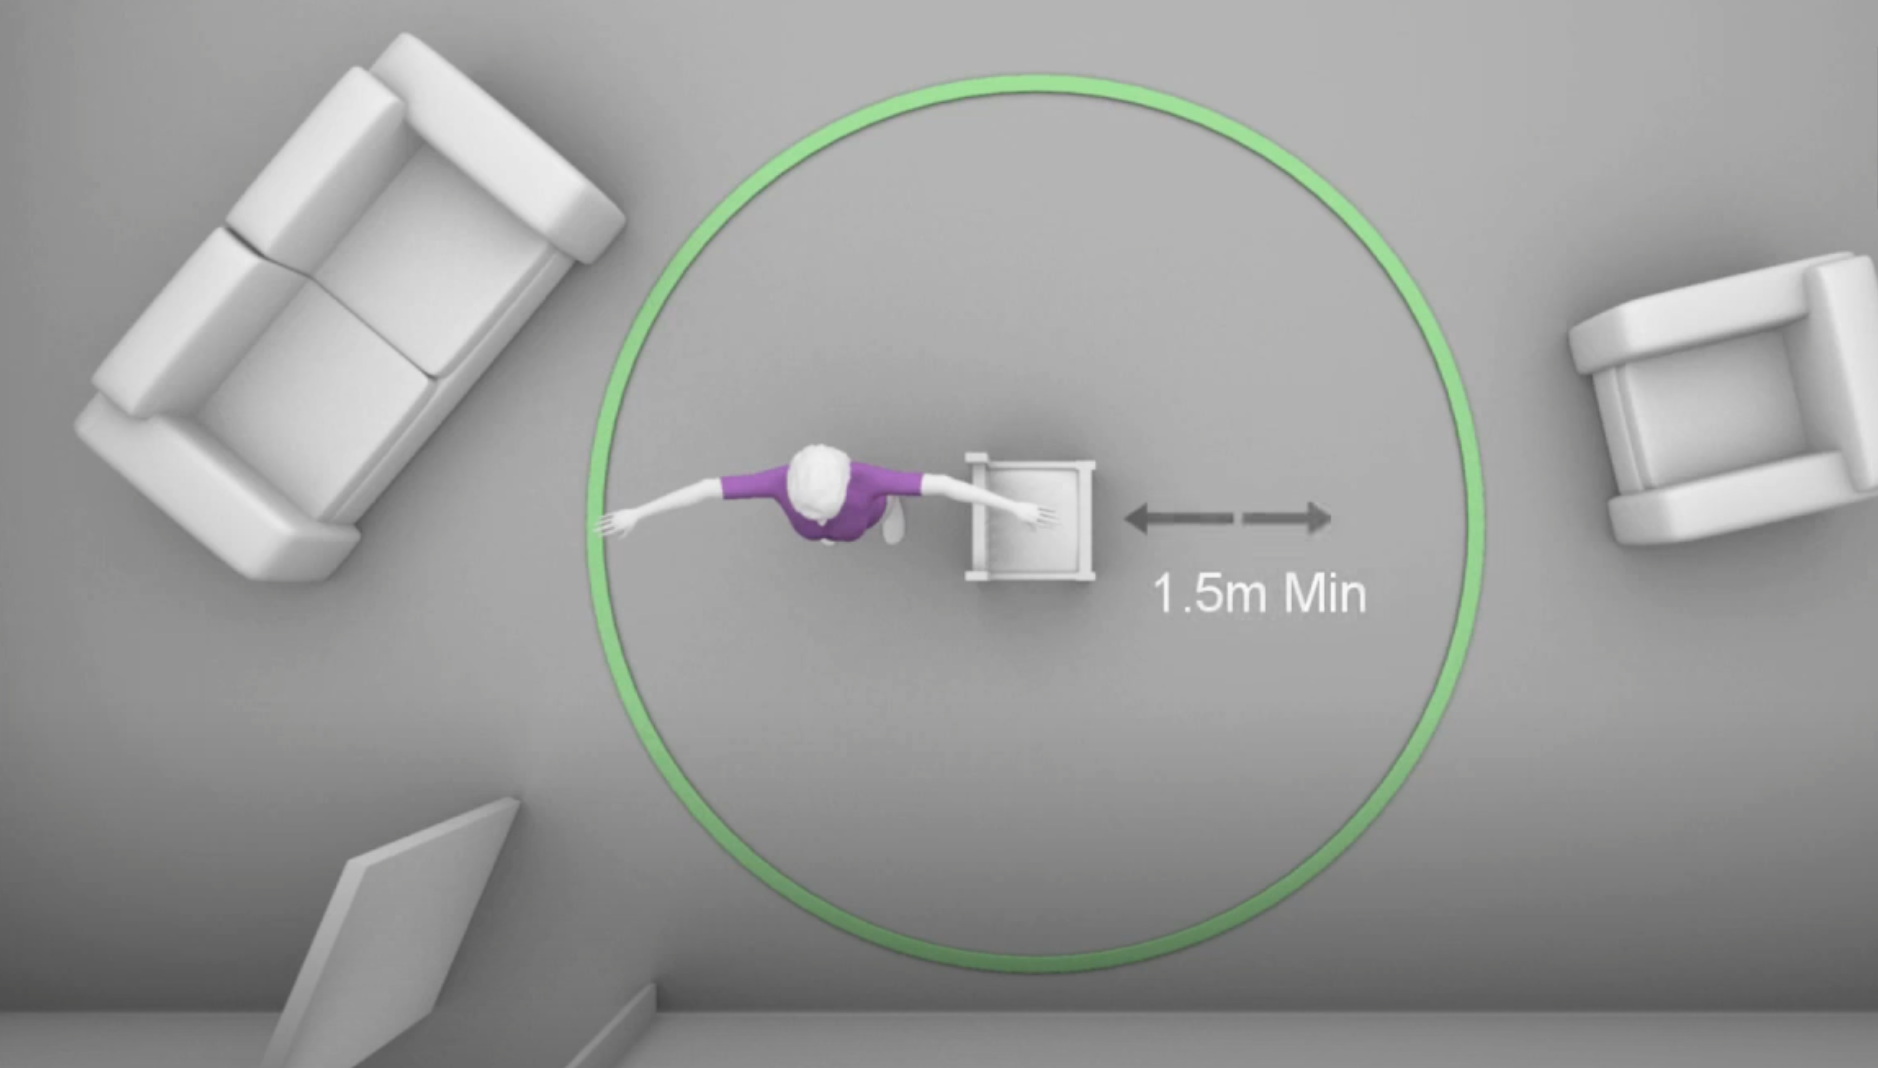
Step 1: Select the Ideal Location
Choose a space with enough room for your dance routines. A 5-8 foot radius around the pole is typically sufficient. The pole should be installed beneath a ceiling joist for maximum support.
Step 2: Find the Ceiling Joist
Use a stud finder to locate the joist. Mark this spot as the center point where you’ll set up your pole.
Step 3: Measure and Mark
Measure the height from the floor to the ceiling. Most pole kits come with adjustable pieces to accommodate different ceiling heights. Adjust your pole according to your measurement.
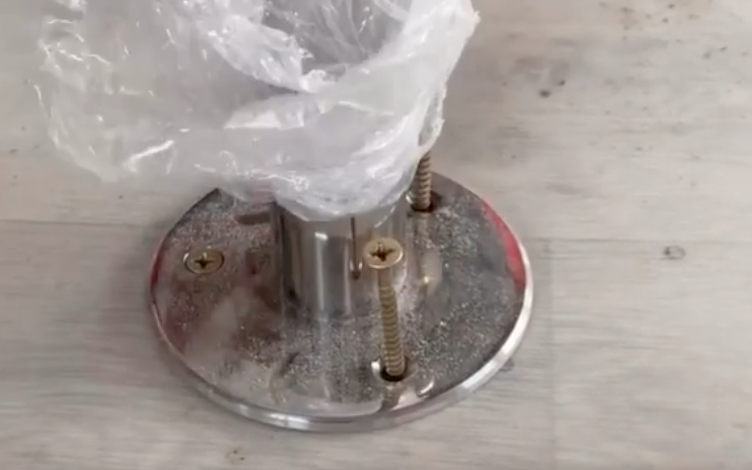
Step 4: Install the Mounting Bracket
The pole kit should come with a mounting bracket that needs to be installed into the joist. Drill the holes for the nuts according to the instructions provided and secure the bracket to the ceiling.
Step 5: Install the Pole
Insert the pole into the bracket and make sure it’s vertically straight using a level. Position a bottom mount directly beneath the top mount and secure it to the floor.
Step 6: Secure the Pole
Once the pole is straight, tighten the adjuster screws according to the instructions to secure it in place. Double-check to ensure the pole is firmly anchored.
Installing a Removable Fitness Pole
Portable poles are designed for easy installation and removal, making them ideal for temporary set-ups. This is a relatively new type of pole that is installed without having to be attached to either the floor or ceiling. The essence of the method is to install the pole in a spacer between the ceiling and the floor. The main feature of such a pole is that both disks, upper and lower, have a wide enough diameter, which makes it possible to install your pole without holes in the ceiling.
Step 1: Select the Location
Just like with a permanent pole, choose a spot with sufficient space for dancing. Ensure the ceiling above this spot is flat and sturdy.
Step 2: Assemble the Pole
Follow the instructions provided with your portable pole kit to assemble the pole. This typically involves connecting the pole pieces and adjusting the height to match the distance between your floor and ceiling.
Step 3: Install the Pole
Extend the pole until it’s firmly wedged between the floor and ceiling. Many portable poles have a screw or locking mechanism to secure them in place.
Usually, the order of assembly is that you first connect the two main parts of the pole according to the instructions, so that the edges of the tubes fit tightly together, then tighten the two parts together with a special wrench. These two main parts will always be together. Then you add extensions according to the height of your ceiling, if necessary. Then, according to the manufacturer’s instructions (mechanisms may vary), you connect the pole to the Base and the Upper Dome. The next step is to raise the pole vertically. Here you will need a second person to hold the base while you carefully raise the pole to the vertical position.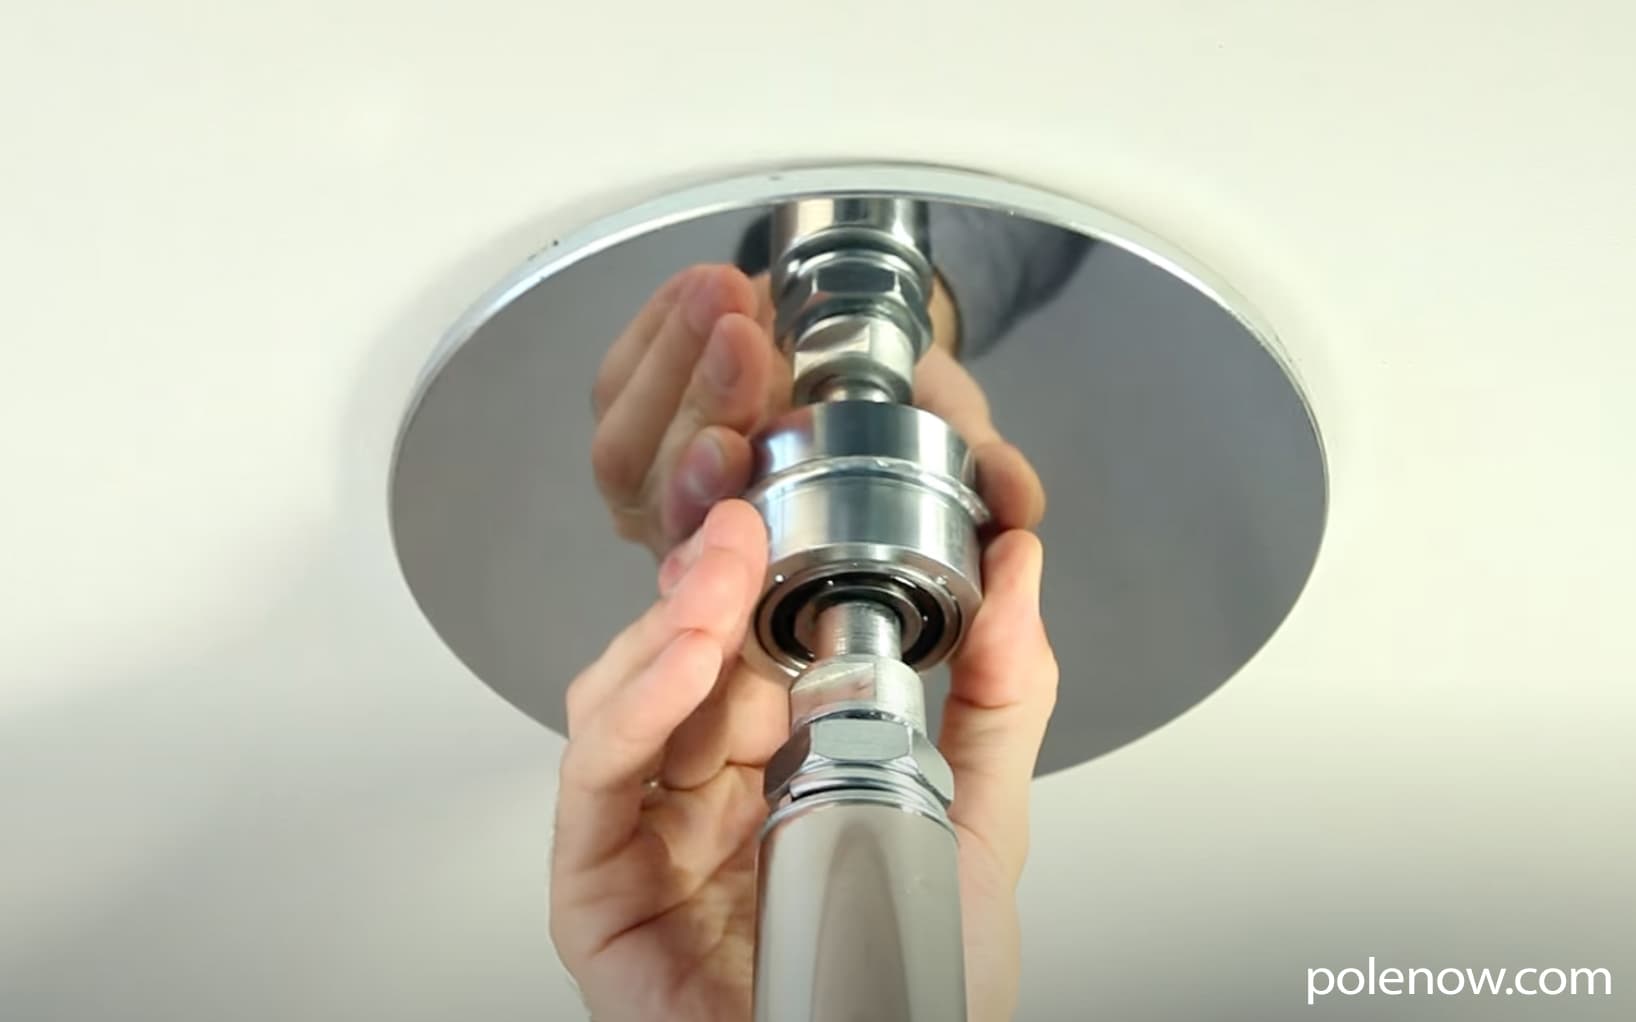
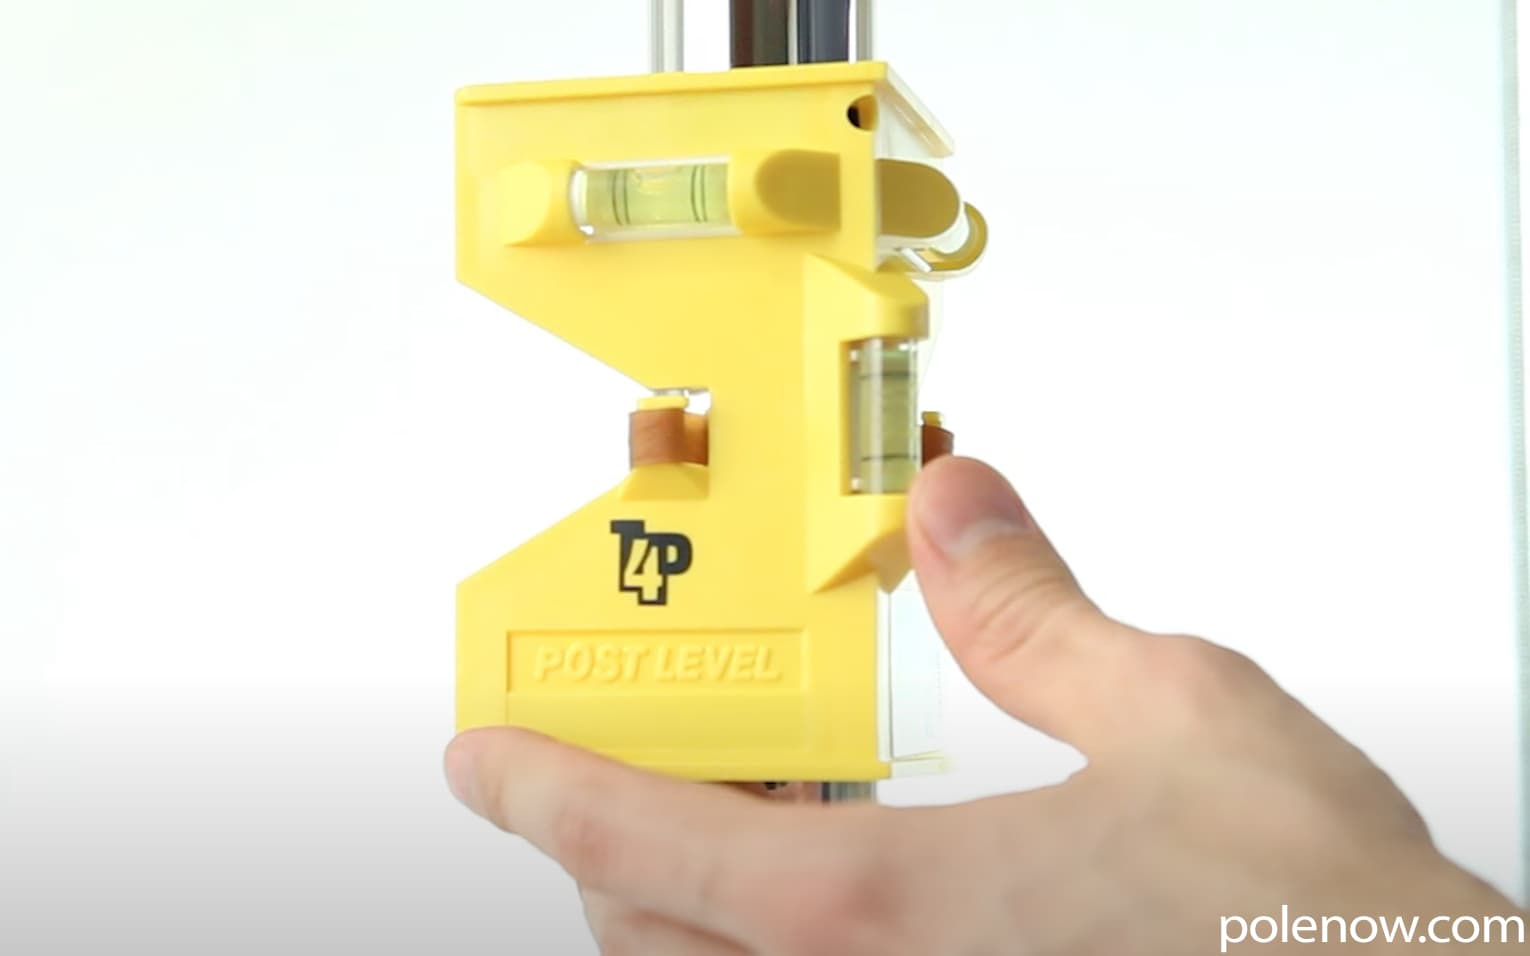
Now you need to increase the length of the pole so that it rests on the ceiling and floor maximizing the tension. Once you have set up the pole, make sure it is exactly vertical using a spirit level. The base and the Upper Dome should fit snugly on the surfaces, without any gaps.

If included, install a decorative sleeve:

Step 4: Check the Pole is Level and Secure
Use a level to ensure the pole is straight. Check that it’s firmly secured and can support your weight. Do this by applying some pressure to the pole. If it doesn’t budge, you’ve installed it correctly.
- X-Pole Installation Manual – link
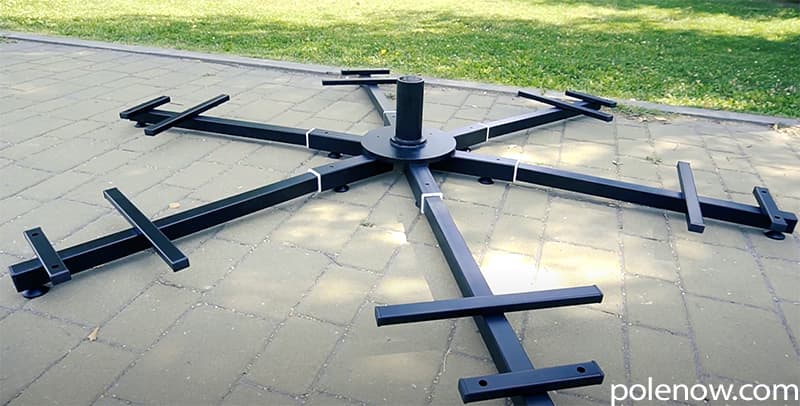
Installing a Dance Pole with stages
Step 1: Assemble the stage frame
The primary structure of the stage consists of six adjustable subframes that, when spread out, form a star-like shape. Begin by locating the first subframe, which is immobile and affixed directly to the base plate. This is the only subframe that remains stationary and can be identified by opening all the subframes and searching for the one fastened securely to the main frame.
From the first fixed subframe, start spreading out the other subframes in a symmetrical star shape. All the subframes open either way except for the number one subframe which is fixed. Don’t worry about exact positioning at this point as adjustments can be made when affixing the floor plates. The floor plate sits over the frame to create the stage.
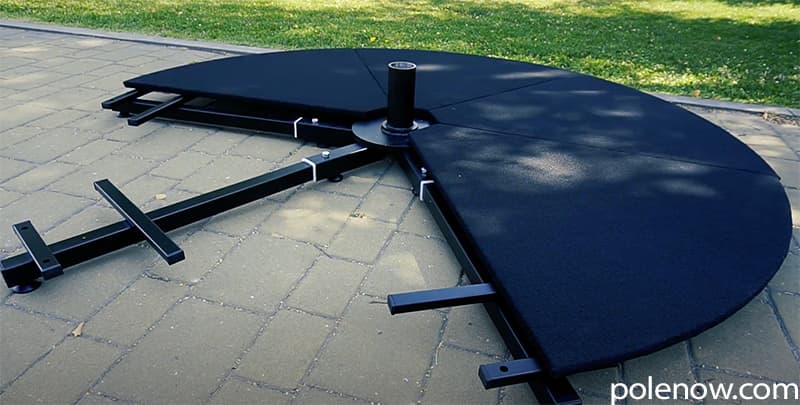
Step 2: Assemble the floor plates
Each floor plate, which forms the surface of the stage, is equipped with two spring-loaded catches, located on either side of the frame. These catches can be locked into place by a simple anti-clockwise twist of 90 degrees, which causes them to spring into position. To disengage them, simply pull them out and rotate 90 degrees clockwise.
To attach the stage plates to the frame, position the plate in such a way that it slips under the upper center plate. Then, align the pin on the floor plate with the corresponding holes on both sides of the subframe. Secure the plate by turning the spring catch 90 degrees anti-clockwise, causing it to lock into place. Repeat this process for each of the six-floor plates.
Ensure that all the plates are properly seated on the pins and that all the spring catches are securely locked into the subframes. Now your stage should be ready for use!
Step 3: Install the Pole
Install the bottom of the pole to the stage mount. Tighten them with a special wrench according to the manufacturer’s instructions.
Step 4: Assemble the Pole
To join the bottom part of the pole to the second part of the pole (pole b) take the X-joint and slide it inside the bottom pole according to the manufacturer manual. And then take the second part of the pole and line it up so the slots fit the key on the x-joint. Tighten it with the key.
Safety Precautions
Regardless of whether you choose a permanent or portable pole, safety should always be your first concern. Ensure that the pole is secured and level before use. Regularly check your pole for any wear and tear and ensure all parts are tightly secured.
Remember, pole dancing can be a rigorous activity, and the pole should be able to support your full body weight. Always practice new moves carefully, and consider investing in a crash mat for added safety, especially when starting out.
With the right precautions and proper installation, your home can be ready for a fun and healthy pole dancing experience.
Happy dancing!